
Artifacts in CBCT
CBCT technology is rapidly gaining popularity in the dental space, providing detailed and precise anatomical structure information and enabling advanced diagnostics and treatment planning for implantology, orthodontics, oral surgery, and endodontics.
CBCT technology has its limits, though, artifacts being a major one. Artifacts refer to variances between the reconstructed image and the actual content of the scanned subject. These variances usually make the results of scans diagnostically unusable as a result of their degraded quality. In addition to having degraded quality, structures that do not exist within the subject might appear in the images, creating a largely inaccurate scan result. These structures come about as a result of an imprecise image capture, reconstruction process or even patient motion. Artifacts make proper diagnosis very difficult and sometimes impossible to carry out. This article aims to highlight everything you need to know about artifacts and how to minimize them in CBCT scans.
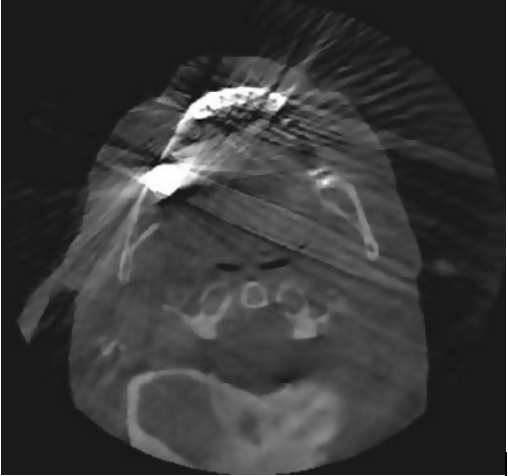
Metal Artifacts
Metal streak artifacts are quite common in CBCT scans, often caused by patient-related objects such as implants, crowns, posts, fillings, and other radiopaque materials. These high-attenuation objects cause noise scattering and beam hardening, often resulting in bright and dark streaks that degrade the image quality.
Minimizing Artifacts in CBCT Scans
Minimizing metal artifacts produces a cleaner image, increasing diagnostics and improving treatment planning abilities. Other than the obvious, e.g. taking off metal objects (mainly jewelry), there’s another way to reduce artifacts – a brilliant one.
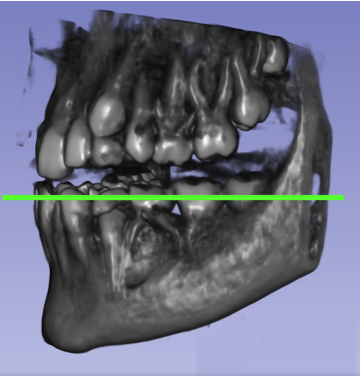
Deflection
Artifacts generated from metal or other radiopaque materials appear only in the plane horizontal to the patient positioning during the scan. By deflecting the artifact plane from the region of interest (ROI), you get a scan in which your ROI is cleaner, providing you with better diagnostics.
This deflection is executed by simply tilting the patient’s chin up or down when positioning for the scan.
For implant planning, the best patient positioning in most cases will be occlusal plane horizontal, leaving all crown and filling artifacts in the occlusal plane. In these cases, the bone will be as clean as possible.
It can still be affected by implants, deep posts, or gutta-percha.
When the ROI includes one or more teeth in the mandibular anterior region, position the patient with their chin tilted down. This way, artifacts generated in posterior areas will stay above the ROI.
ROI – mandibular posterior region: Place the patient with their chin tilted up. This will keep artifacts generated in the mandibular anterior region above the ROI.
ROI – maxillary anterior region: Place the patient with their chin tilted up. This will keep artifacts generated in the posterior area under the ROI.
ROI – maxillary posterior region: Place the patient with their chin tilted down. This will keep artifacts generated in the maxillary anterior region under the ROI.
ROI – premolars and first molars in either jaw: Place the patient with the occlusal plane horizontal.

Make sure to help your patient place their heads in the various positions. Guide them in clear terms where to place their chin and change the machine height as needed.
In conclusion, it is easy to see that artifacts get in the way of carrying out proper diagnoses and treatment. Despite that, with careful planning and attention to detail, you can achieve good, usable results for your needs.