CephX AI Just Got Better – New Features Inside
Dear Valued CephX AI Users,
We’re excited to introduce a set of powerful new features that boost your clinical efficiency, elevate patient communication, and simplify your daily workflow. Explore what’s new and discover how these updates can elevate your practice.
Newly Released Features
Discover the Newest 2D Features:
Visual Treatment Objective (VTO) & Surgical Treatment Objective (STO)
A next-generation feature – the VTO, turns a standard 2D cephalometric X-ray into a dynamic, interactive planning tool that lets clinicians simulate and visualize orthodontic or surgical treatment outcomes directly on the image. It helps predict jaw and tooth movements, visualize soft tissue changes, and compare different treatment scenarios, making it easier to communicate plans clearly and confidently. By bridging the gap between diagnosis and patient understanding, VTO makes treatment planning more precise, visual, and intuitive.
How Does It Work?
Once you click the VTO feature, the right panel lets you move and rotate teeth and jaws with precise controls and optional soft-tissue simulation. They can switch between Ceph, Morph, and comparison views, export images/PDFs/animations or save cases, and edit key cephalometric points and groups.
Discover the Newest 3D Features:
Multi-View Layout
The Multi-View layout makes it much easier to see how each slice corresponds to the 3D anatomy. You can quickly understand where the slice is located, how it relates to surrounding structures, and gain a clearer overall view of the case.
How Does It Work?
You can easily navigate the Sagittal, Axial, and Coronal views on the left side of the screen, and when you move a position line on any slice, the matching line on the 3D airway model updates in real time.
Airway Generation
The Airway View now features an automatic airway generation tool that reconstructs the 3D airway model directly from the DICOM scan.
How Does It Work?
All you need to do is select “Generate Video” to view an overview of the airway reconstruction.
Airway Average Ellipse of Minimal Area Slice
This feature means that along the length of the airway, the software finds the cross‑section where the airway area is smallest, then fits an ellipse to that contour and calculates its size and orientation as an average measure.
How Does It Work?
On slices marked as Minimal Area, if you click on the regression ellipse icon, it reveals additional data by showing the area of the average ellipse, giving a quick quantitative measurement of the narrowest airway region.

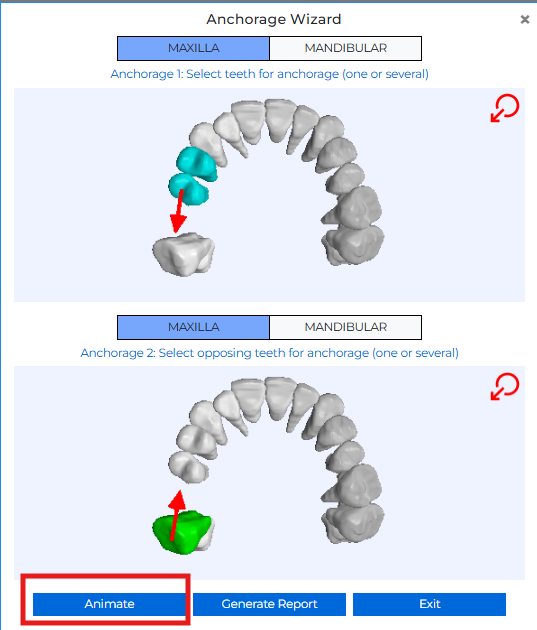
Anchorage Wizard
The new Anchorage Report offers the possibility to define anchorage teeth, select opposing teeth, choose a movement vector, and automatically generate a detailed report or animation that illustrates the planned anchorage interaction.
How Does It Work?
Simply open the Ortho “Calculate Anchorage” tool in the 3D Viewer to launch the Anchorage Wizard, select your anchorage and opposing teeth, set the movement vector, and click Generate Report to download it instantly. You can then click Animate to visualize the planned tooth movement.

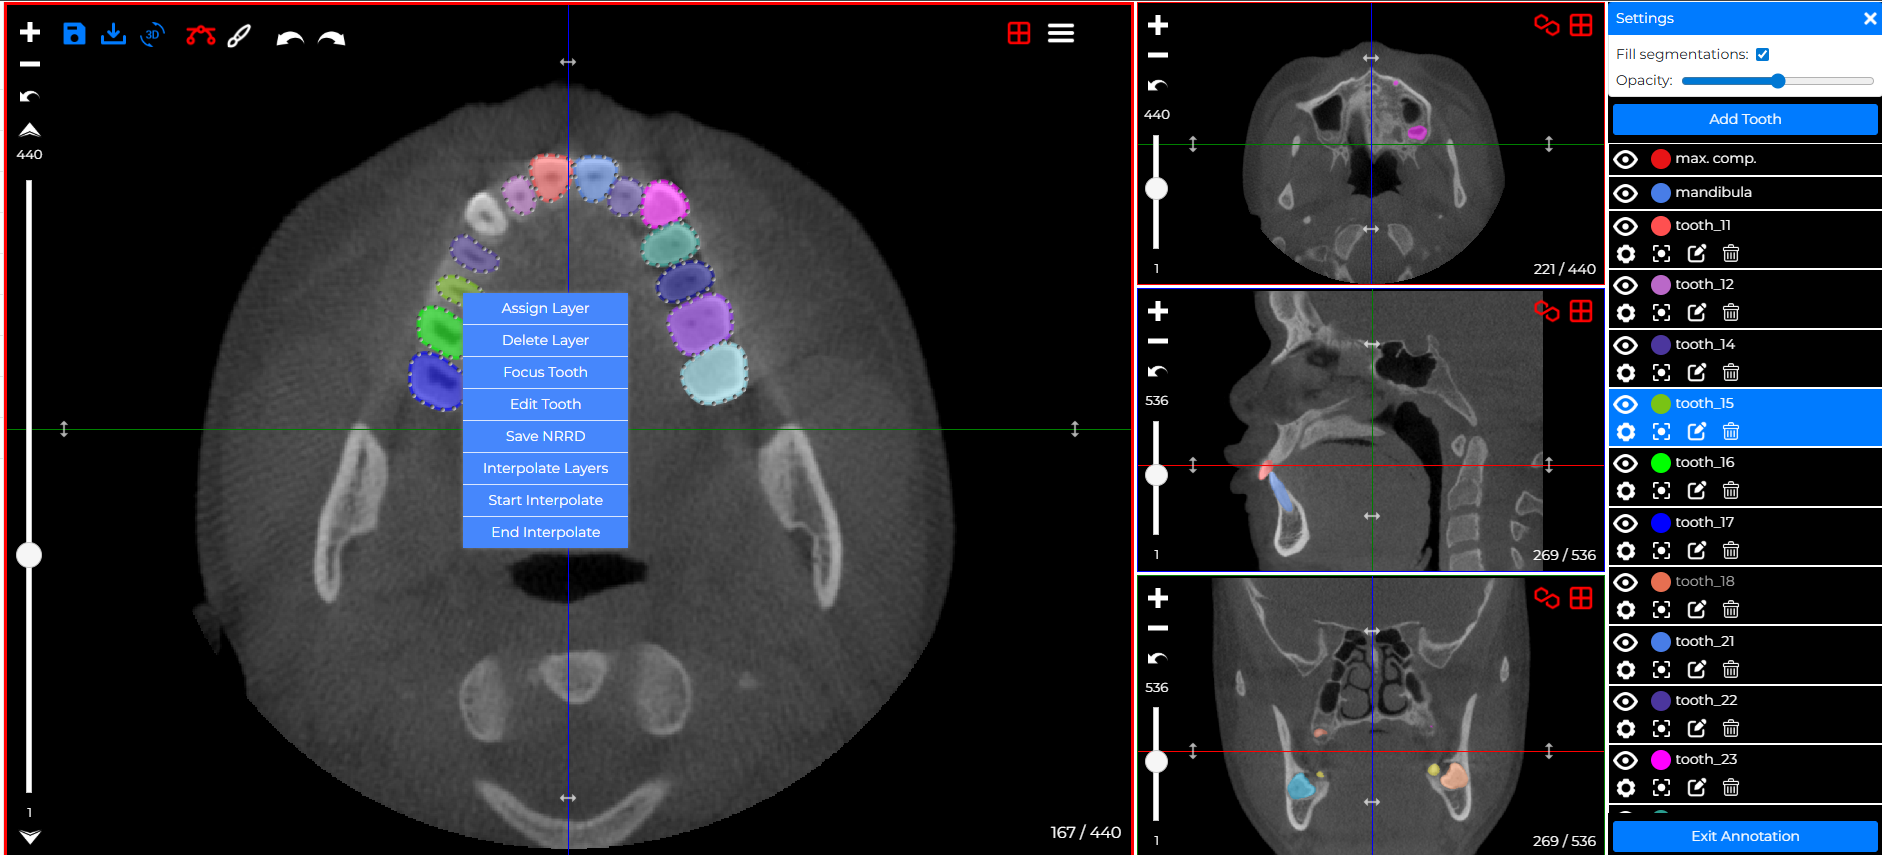
Interpolation
The new Interpolation feature automatically generates tooth layers between defined slices, eliminating manual slice-by-slice drawing. This makes tooth annotation for 3D models faster, more consistent, and saves significant time when creating or adjusting teeth.
How Does It Work?
For an existing tooth, open the annotation menu, select Interpolate, define the start and end layers, and click End Interpolate to automatically generate all layers in between.
For a new tooth, create the first layer, start interpolation, add or clone the second layer on another slice, and end interpolation to let the system build the full segmentation automatically.
Slice Orientation
The Slice Orientation keeps the projection aligned across all views (axial, sagittal, and coronal). When you rotate the projection, all projection lines update together to show the new orientation, and when you move the crossing point on any slice, the lines on the other slices adjust automatically. This makes it easy to fine-tune alignment and keep all views perfectly synchronized.
How Does It Work?
It’s simple: you can rotate or move the projection on any slice, and the system automatically updates the lines across all views to keep the orientation and plane alignment clear and consistent.
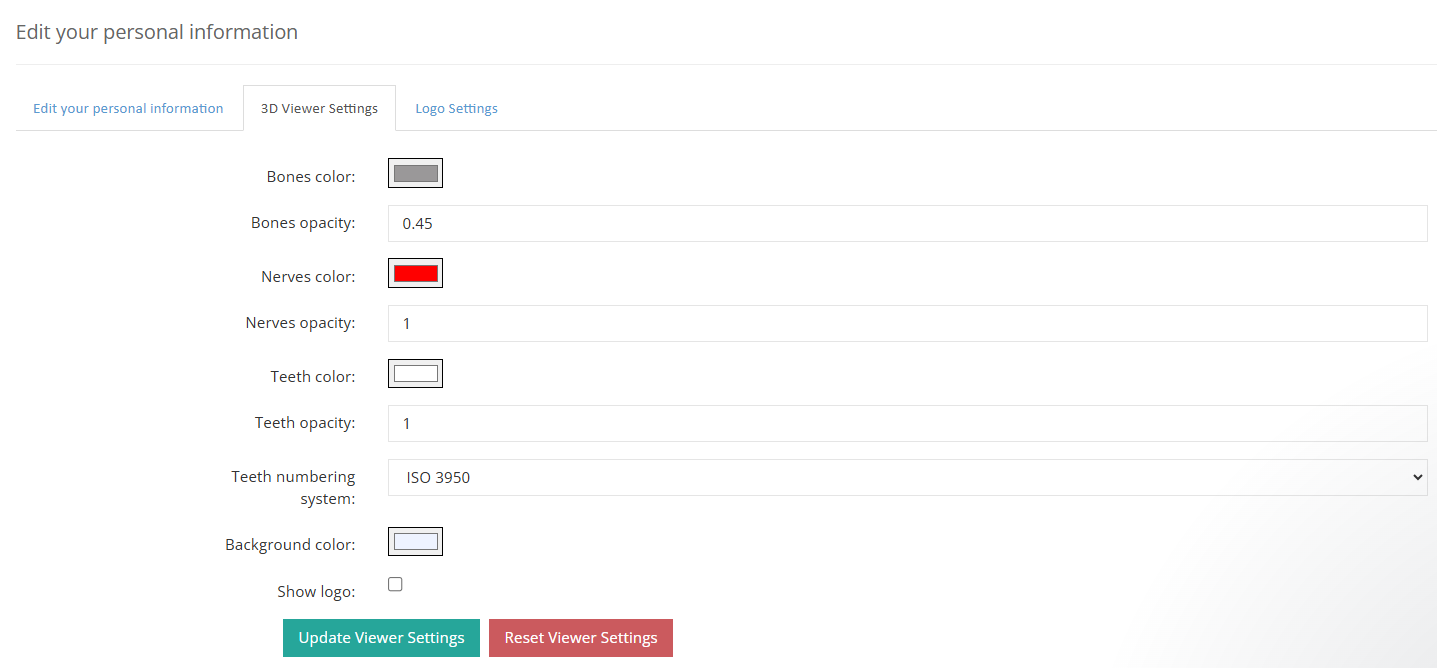
Account Preference
You’ve now got full control over your 3D experience: set your default viewer preferences directly in your Account Settings and enjoy a consistent, personalized view across every single case.
How Does It Work?
A new section in Preferences called 3D Viewer Settings & Logo Settings now lets users customize default colors, opacity, tooth-number visibility, and logo display options.
API and Management Improvements for DSOs
We’ve rolled out a series of backend and workflow upgrades tailored for DSO environments, providing stronger administrative control, smoother case management, and better integration across multiple clinics and users.
2D Module
Enhanced Gallery Mode
The Image Gallery now features a “View All” button with collapsible stage sections and handy zoom controls, making it easy to review, compare, and inspect images from every phase in one place.
How Does It Work?
It’s simple — just select the patient you want, and you’ll be able to open the image gallery with stage views and zoom controls available in the top-right corner.
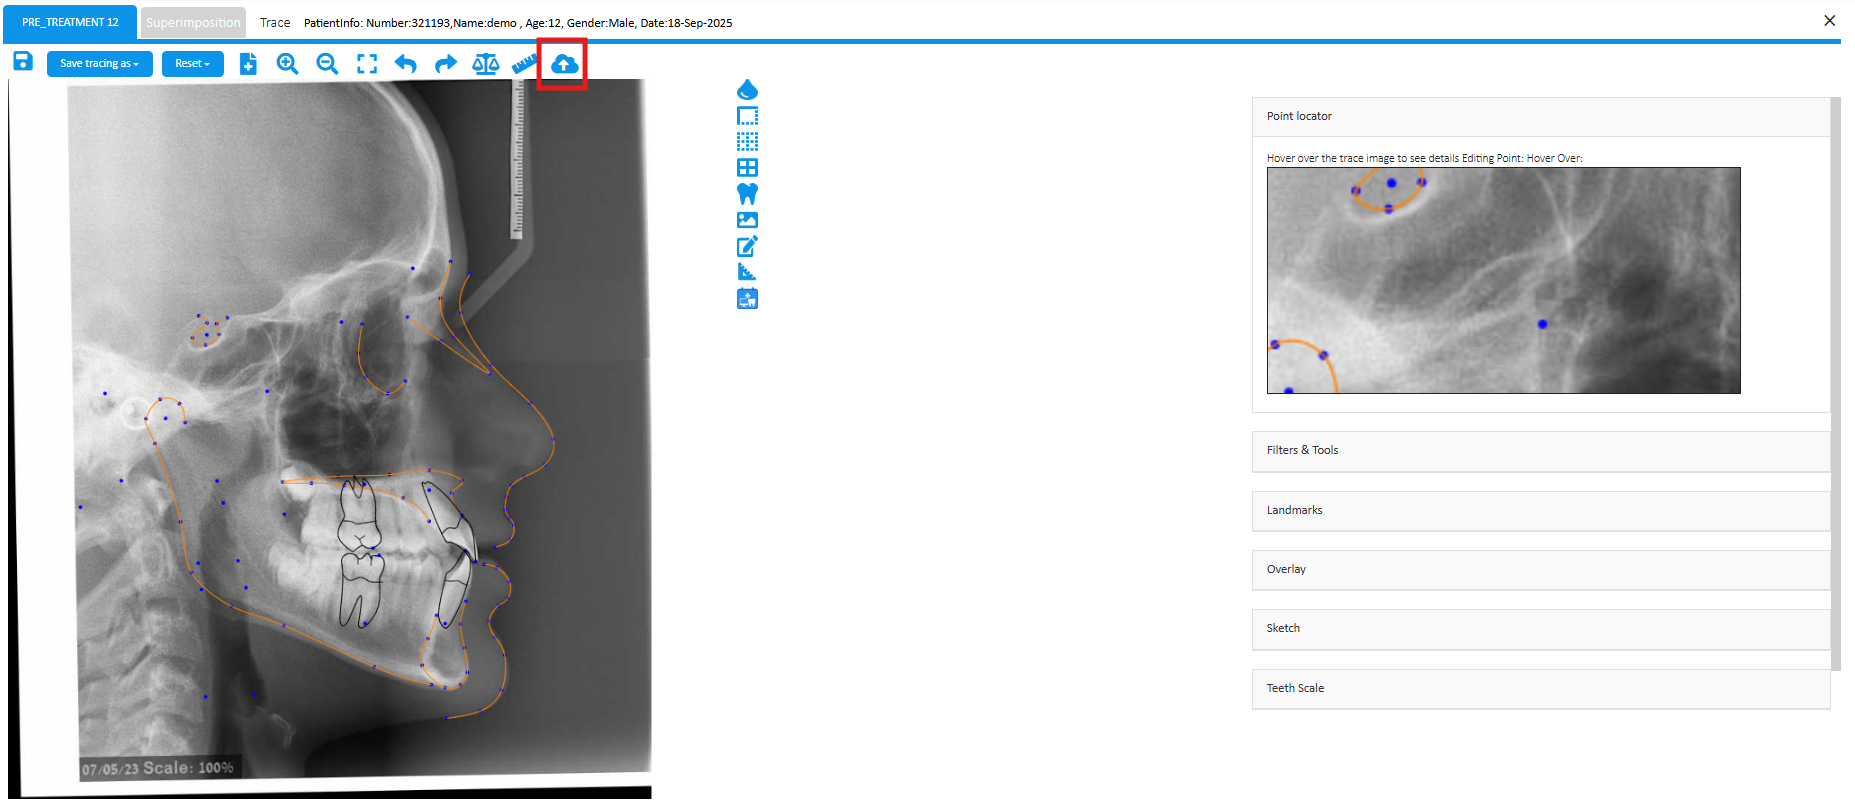
Profile Image Upload
“Upload Profile Image” is now available on the Tracing Page, letting users add a patient’s photo seamlessly as part of the tracing workflow.
How Does It Work?
Once you open the tracing, the image upload button appears right at the top of the Ceph, making it easy to access.
3D Module
Multi-Tooth Selection & Movement in the Planned Stage
We’ve just made orthodontic planning faster and easier than ever: you can now select and move multiple teeth at once in the Planned Stage.
How Does It Work?
Hold down CTRL while clicking to select several teeth, and use the standard movement tools to move them simultaneously.
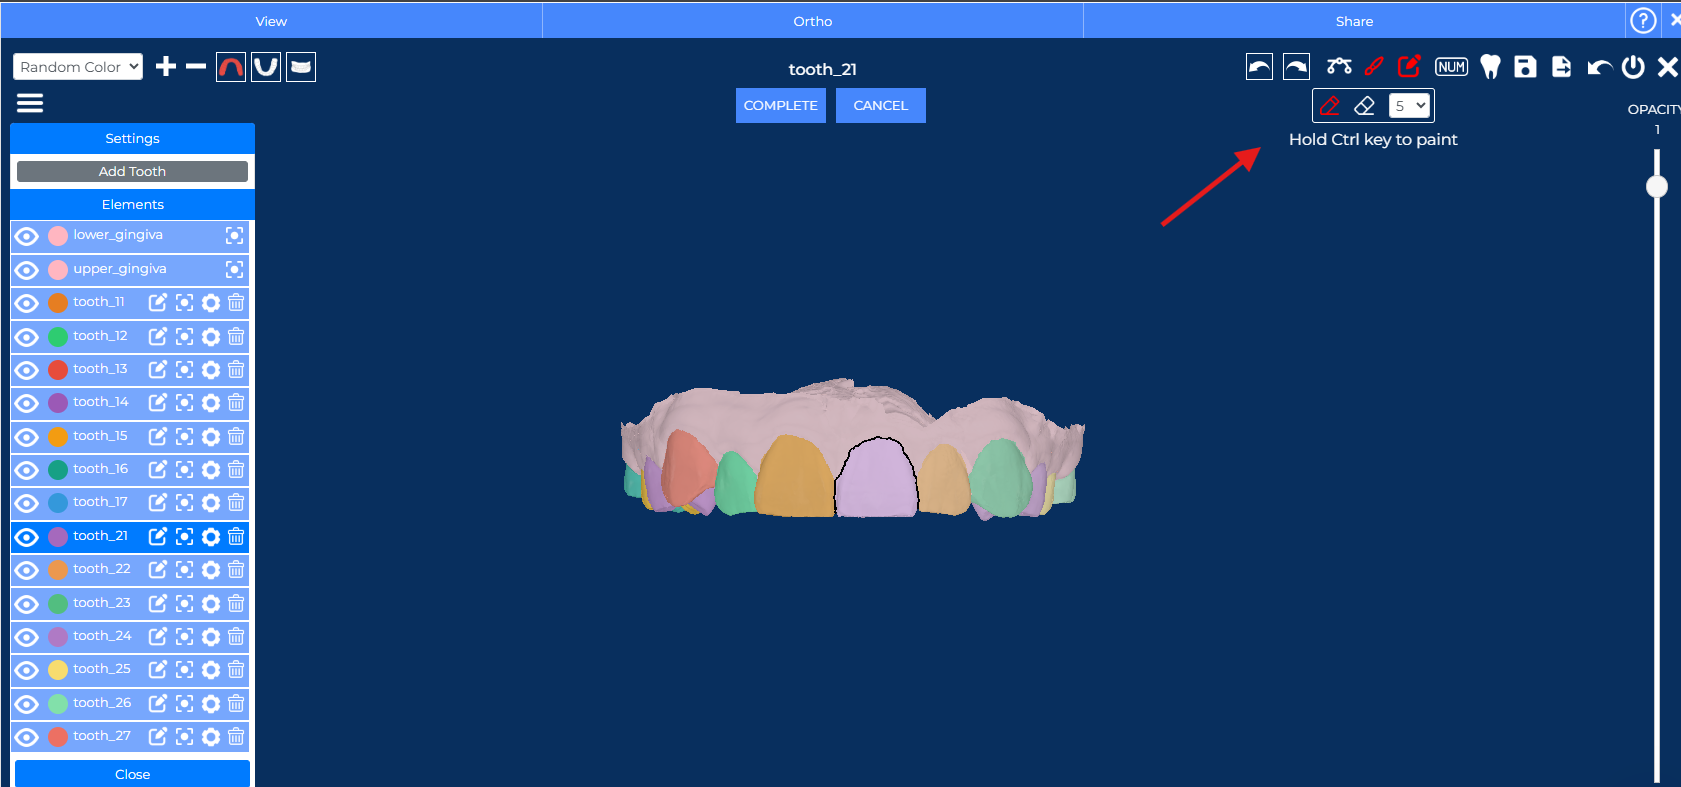
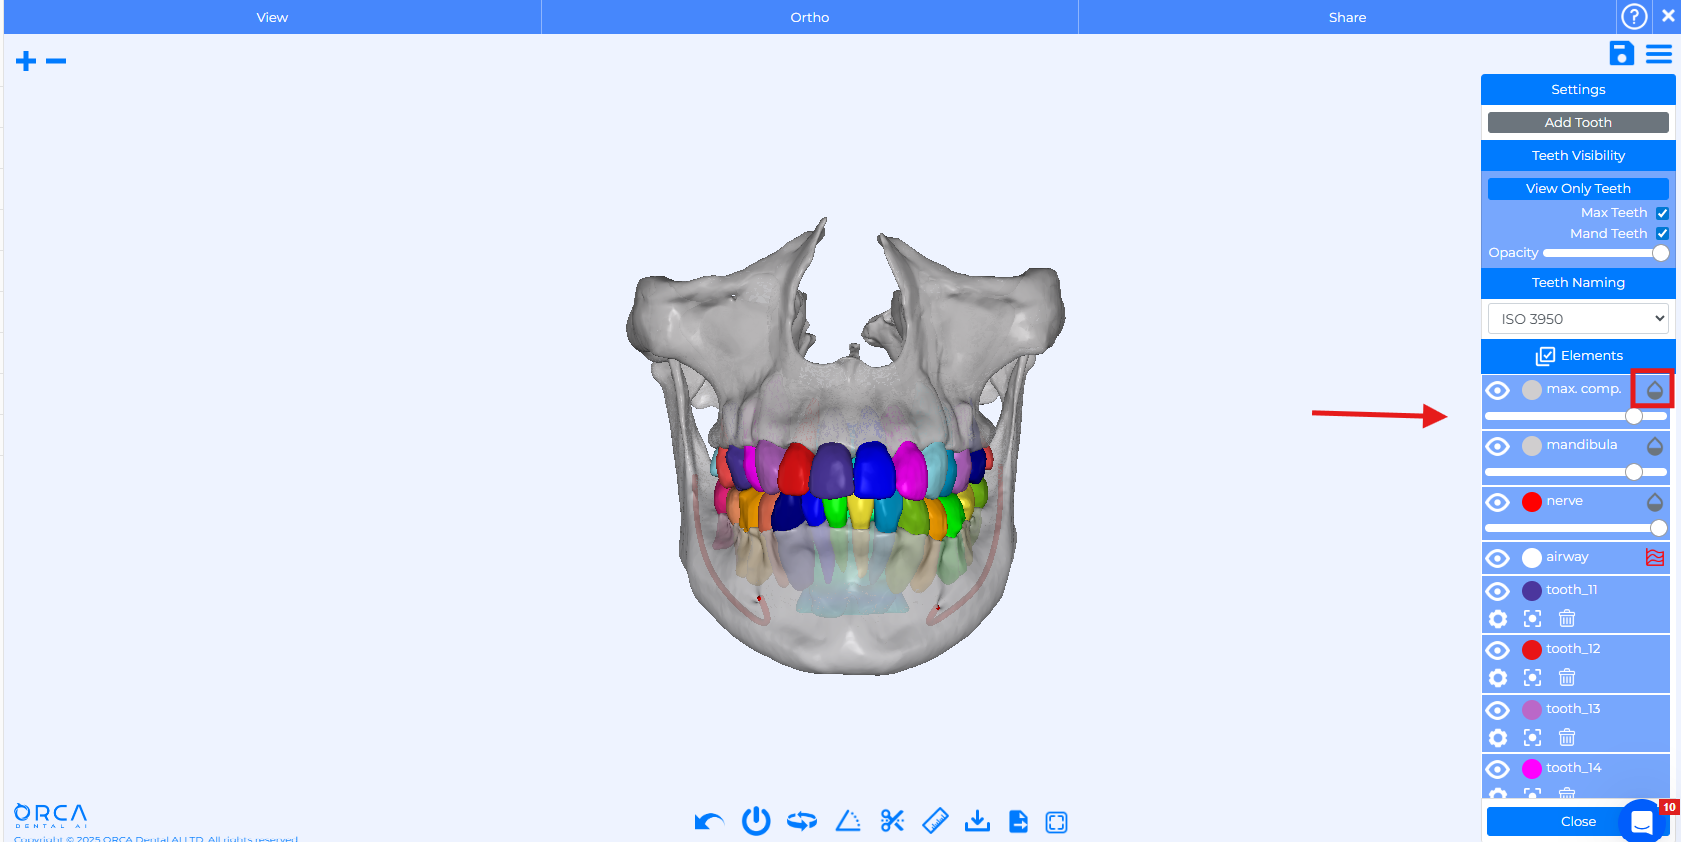
Enhanced Visibility Controls
You now have full control over visibility in the Tooth Panel: adjust the opacity of gingiva, bone, airway, and nerve with dedicated sliders.
How Does It Work?
Simply click the Drop icon to reveal per-element opacity controls and refine your view for more accurate treatment planning.
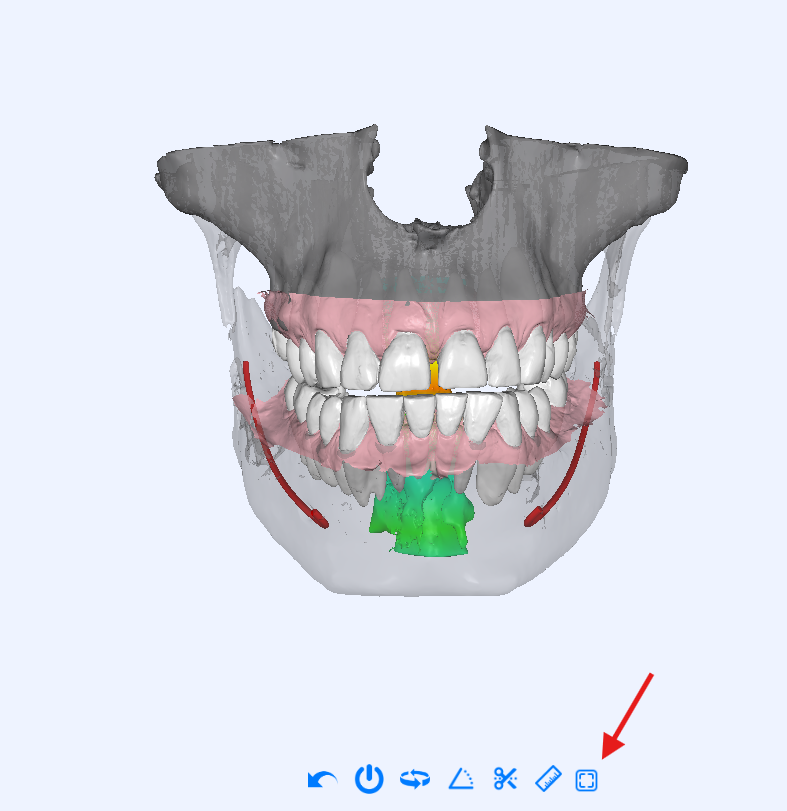
Snapshot Button
A new universal Snapshot button is now available, letting users instantly capture images of their current view. This makes documenting work and sharing visuals with colleagues or patients much quicker and easier.
How Does It Work?
You can access the Snapshot feature across the entire platform, in the 3D View, Airway, and DICOM modules.
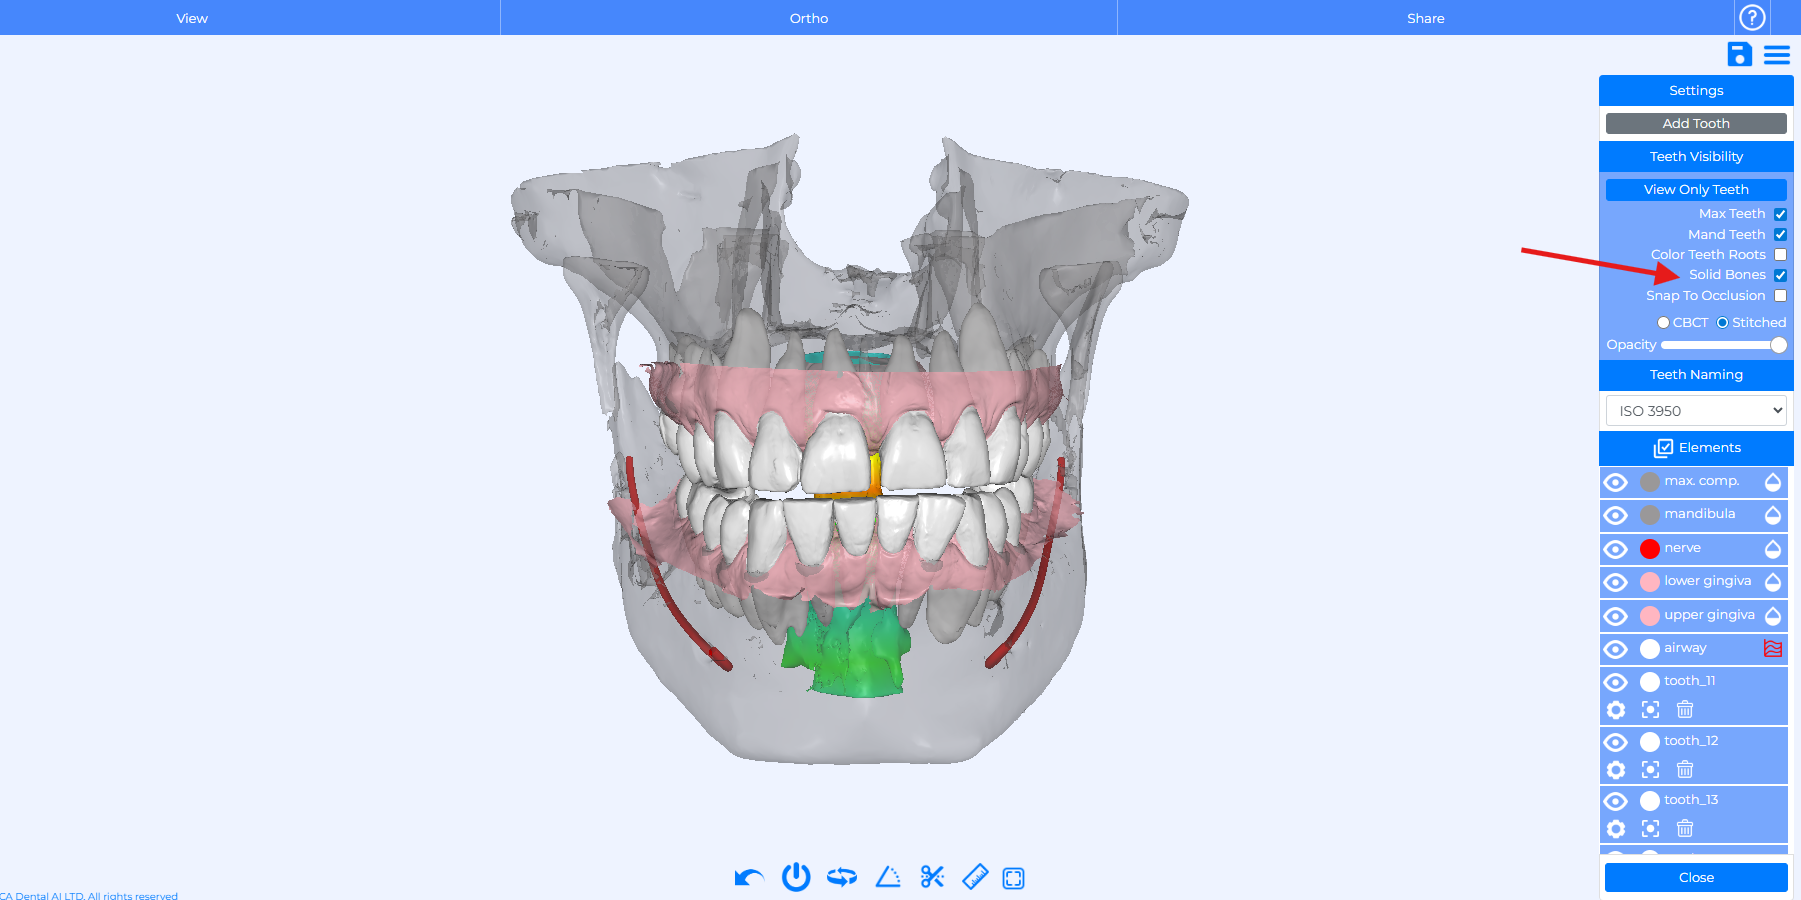
Solid Bones Toggle
We added a new Solid Bones checkbox to the Tooth Panel. It’s enabled by default and immediately switches bones to a solid rendering, making it easier to review anatomical structures and plan interventions.
How Does It Work?
You can easily activate or disable the “Solid bones” feature anytime with a quick toggle in the drop-down menu.
Snap to Occlusion
A new Snap to Occlusion feature is now available for stitched cases. When activated, it automatically aligns the models so the upper and lower teeth fit together correctly, making it easier for clinicians to assess bite relationships with greater accuracy.
How Does It Work?
You can easily activate or disable Snap to Occlusion anytime with a quick toggle in the drop-down menu.
Early Access to the 3D Viewer During Segmentation
Enjoy instant access to the 3D Viewer and DICOM View, even while a case is still processing, being reprocessed, or when segmentation has failed.
How Does It Work?
After uploading a CBCT, you can access the DICOM immediately, even before segmentation has finished processing.